Global Sevilla International School - Graphic Design Subject

Global Sevilla International School - Graphic Design Subject.
This is where to find materials for GD Assignments, and Best GD Works from all grades!
(Most of the design work of students contain images that they got from the GoogleImages, which then they edit and use in their design layout. Neither they nor the teacher and the school has never stated that the design of these original materials are their work. The work of these students solely for the benefit of school work, not commercial.)

Monday, September 30, 2013

New Post at last..

My dear ex-students from Sevilla School..

I'm no longer teaching Graphic Design in Sevilla. I've moved to another city since July 2013. I'm still a teacher, and I have lots of new students here, too. It was busy these past months. That's why I haven't update this blog. But, I'll try to keep update this blog.. I'll search through my files and will put your graphic design works thas haven't been put in this blog. Perhaps now, some of you took Graphic Design as your major, and would find your design works while you were in high school useful as parts of your portfolio.

I wish all of  you the best for your future life.

Feel free to contact me, if you have something to ask, or just to say hello, by sending me email at : nancyj.simanjuntak@gmail.com.


Monday, May 27, 2013

FIRE EFFECT - THE STEPS


1. Start a new RGB document (size around 600x600) filled with black background.
- Use the type tool and create a new text in WHITE and position the text centered in the lower half of the document.

2. Now create a new empty layer by clicking on the create new layer icon.

3. Now Press CTRL+ALT+SHIFT+E, this will combine all layers to the new layer.

4. Now apply the Wind Filter to this new layer (Filter » Styleize » Wind)
Method: Wind, Direction: From the Right.

Press CTRL+F 2 times to reapply the filter 2 more times.

5. Now rotate the image back to normal: Edit » Transform » Rotate 90CW 

6. Now go to Filter » Blur » Gaussian Blur: enter 5.0 px

7. Now go to Image » Hue/Saturation
Check the "Colorize" Box.
Set Hue to 40 and Saturation to 100


8. Now Duplicate this layer, to do this, right click on the layer and choose "Duplicate Layer"


9. Now apply some Hue saturation to the new duplicated layer:
Image » Adjustments » Hue Saturation:
Set Hue: -40


10. Now set the duplicated layer's blending mode to: Color Dodge 

11. Now go to Layer » Merge Down To merge the 2 layers together.

12. Now to create our flames, we go to Filter » Liquidfy. Now with the Warp tool selected, set brush size to between 40 and 50, and brush pressure to around 40 to 45.

13. Now just click and drag from the white edge of the text to wiggle your way into the orange to create the flame.

14. Next, change your brush size to about 30, and pressure to about 30, and go for 2nd round of creating your flame.

15. Once your happy with your flame, hit OK.

16. Now move the original text layer to the top on the layers pallete, and change it's color to black.

17. Now go to Layer » Rasterize » Type to rasterize the text layer. Now use the Eraser tool and select the 200px SOFT brush, and erase out the top half of the text.

18. Now, if you want to create a reflection, do a selection about half of the bottom part of the flame.
Press CTRL+SHIFT+C to copy, then CTRL+P to paste this as a new layer.

19. Now go to Edit » Transform » Flip Vertical, Then use the move tool to move the layer down just below the text. Set this layer's opacity to 20%. You can use the eraser tool with 200px soft brush to erase out the bottom part of the reflection.

Sunday, May 05, 2013

FIRE EFFECT ON OBJECTS


Download the full-size images, crop the background, and create a fire-effect on these objects.

Saturday, March 09, 2013

Materials GD Final Exam (Senior Classes)

Materials for GD Final Exam (Senior Classes):

The main points are :

1. Six Components of Graphic Design :
  •  Four Groups  of Line based on the Orientation
  • Five Types of Typography
2.  Graphic Design Principles :
  • Symmetrical Balance
  • Asymmetrical Balance
  • Radial Balance
  • Regular Rhythm
  • Flowing Rhythm
  • Progressive Rhythm
3. Photoshop Animation :
  • The Panels used in creating animation in Adobe Photoshop (Layers Panel, Animation Panel, Frames, etc. )
  •  Icons recognition (Duplicate Selected Frame Icon, Tweens Icon, Delete Frames Icon, etc.)

There will be 3 (three) sections for this exam : Multiple Choice, Essay, and Sketch.

Questions or need more informations about this article? Send to my email address.


Tuesday, February 05, 2013

SENIOR : MOTION ANIMATION

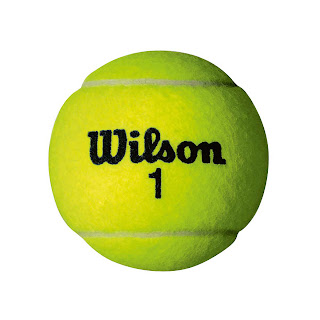
 Download and Save these images below. Use it for the next practice in creating simple motion-animation in Adobe Photoshop.

BASKETBALL

TENNIS BALL

SOCCER BALL

VOLLEY BALL
BALLOONS

Sunday, January 06, 2013

Thursday, January 03, 2013

10 SBI : Alternative Images for Manipulating Photos

Here are the pictures that you can use for Classwork-2 : Manipulating Photos (Individual Work).
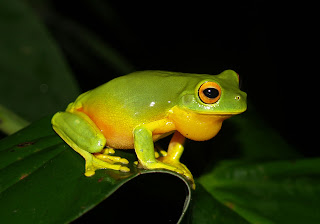
You may also choose image of other animals you can find in Internet.

Tips : Choose 2 or more images of animals with the same or similiar colour range.


*These images are belong to Asep Effendhy, the author of 12Jam Jago Manipulasi Photoshop (Published by Mediakita, 2010).

Junior : Classwork-1 - Manipulating Photos (Practice)

Here are the pictures for your Classwork-1 : Manipulating Photos--Practice.
The first image is : Colibri, and the second one below is : Wolf.


*These images are belong to Asep Effendhy, the author of 12Jam Jago Manipulasi Photoshop (Published by Mediakita, 2010).